Garlic is one of the most versatile and essential ingredients in kitchens worldwide. Beyond its culinary uses, it has numerous health benefits, including boosting immunity and improving heart health. Imagine growing garlic at home without a garden, soil, or expensive equipment — producing many bulbs and large, healthy leaves.
The YouTube video “How to grow garlic in plastic bottles with water for many bulbs and large leaves” reveals a unique and simple method for garlic cultivation using just plastic bottles and water. This method is perfect for urban gardeners, busy individuals, and beginners, providing a high yield in limited space.
In this blog post, we will guide you through every step of growing garlic in bottles, from preparation to harvesting, including tips for maximizing bulb size and leaf growth.
Why Grow Garlic at Home
Homegrown garlic offers several advantages:
Fresh and chemical-free: Store-bought garlic often loses nutrients and may contain preservatives.
Space-saving: Ideal for terraces, balconies, or even kitchen windowsills.
Cost-effective: Save money by growing multiple bulbs from a few cloves.
Continuous supply: Grow garlic year-round using this water-based method.
Easy and low-maintenance: Minimal effort compared to traditional soil gardening.
Even with limited space, you can enjoy healthy, organic garlic by following this method.
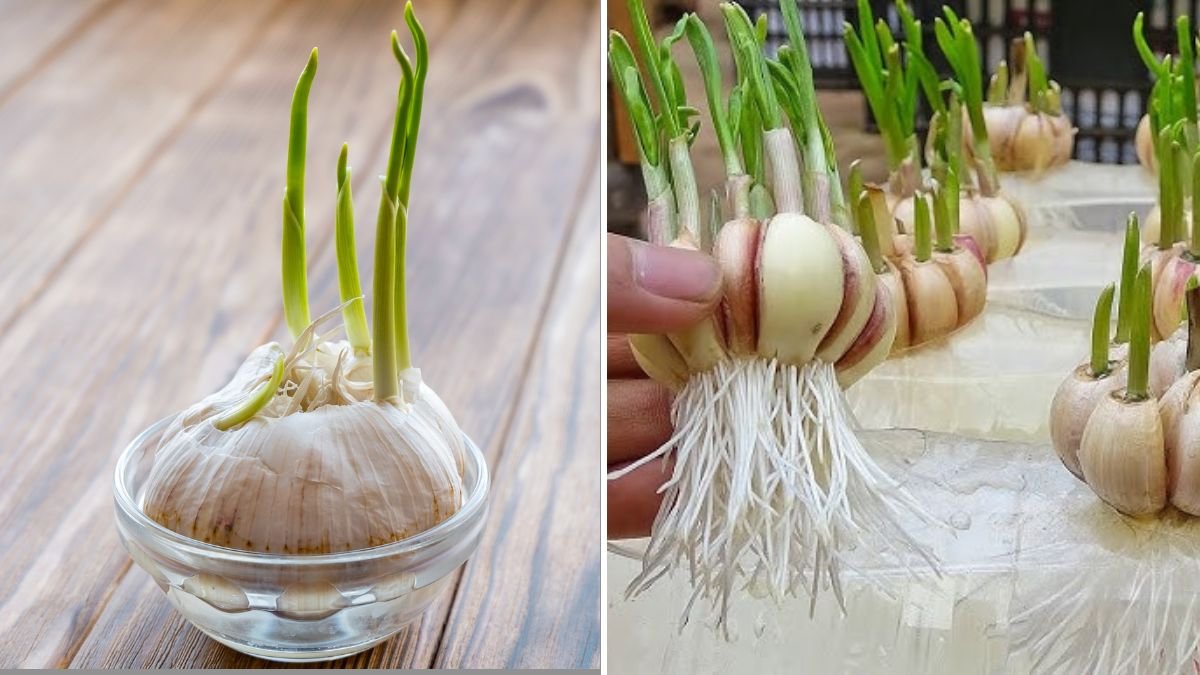
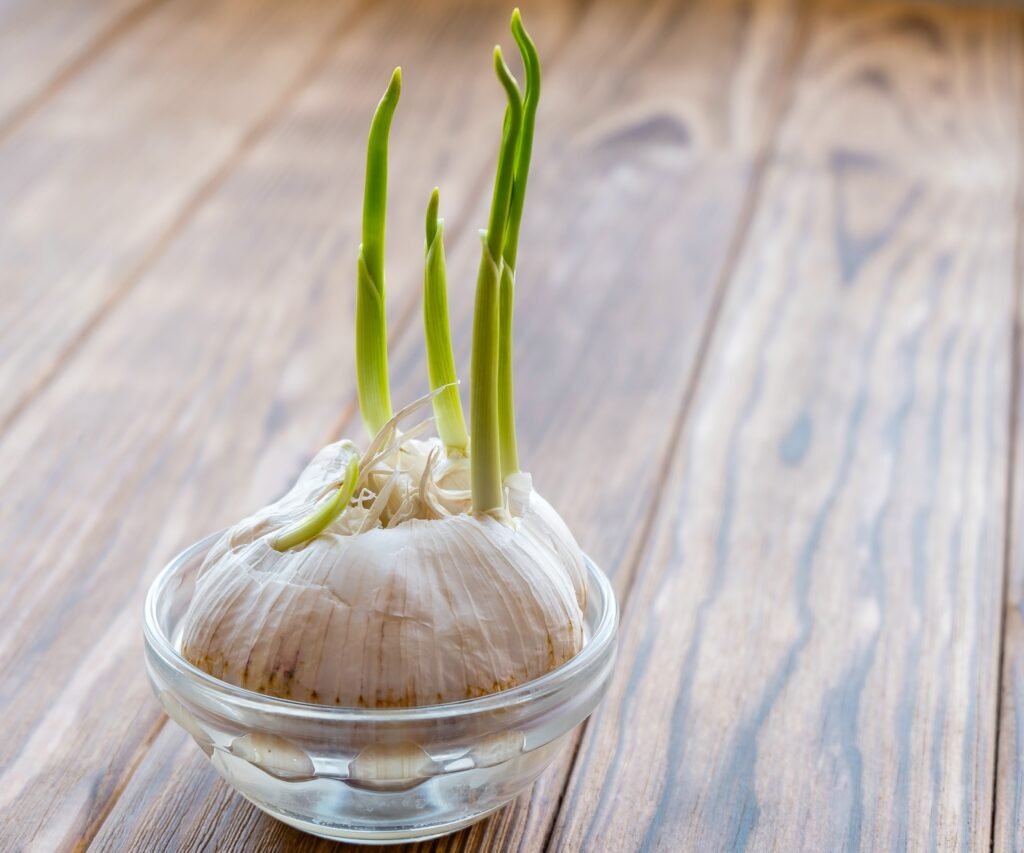
Step 1: Selecting Garlic Bulbs
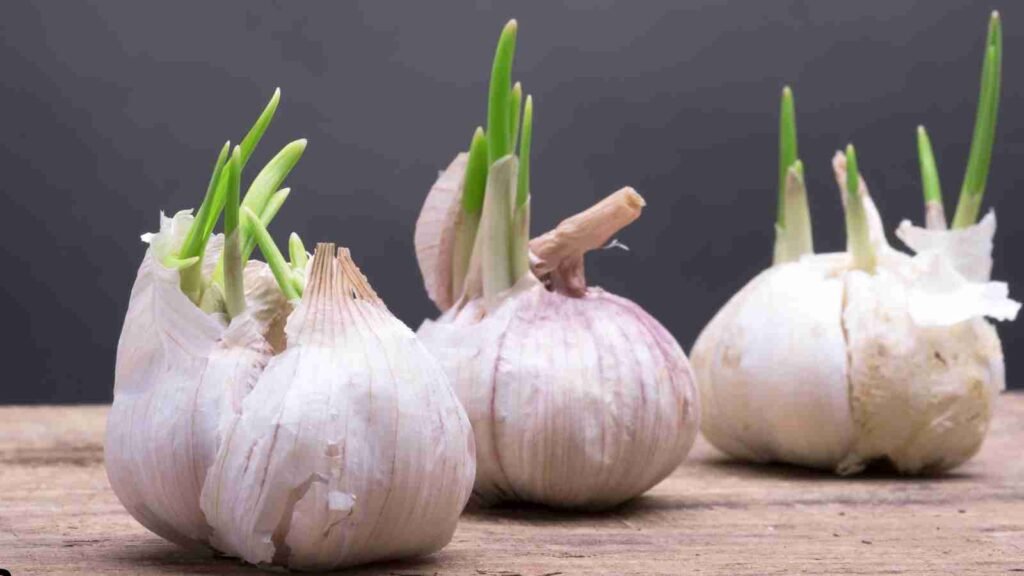
The first step is choosing the right garlic bulbs for planting.
Tips for selecting bulbs:

- Choose healthy, firm, disease-free garlic bulbs.
- Opt for large cloves; they tend to produce bigger bulbs and leaves.
- Avoid bulbs that are soft, damaged, or sprouting excessively, as these may not grow well.
- Organic garlic is preferred for chemical-free growth.
Selecting quality bulbs ensures strong, productive plants with many cloves.
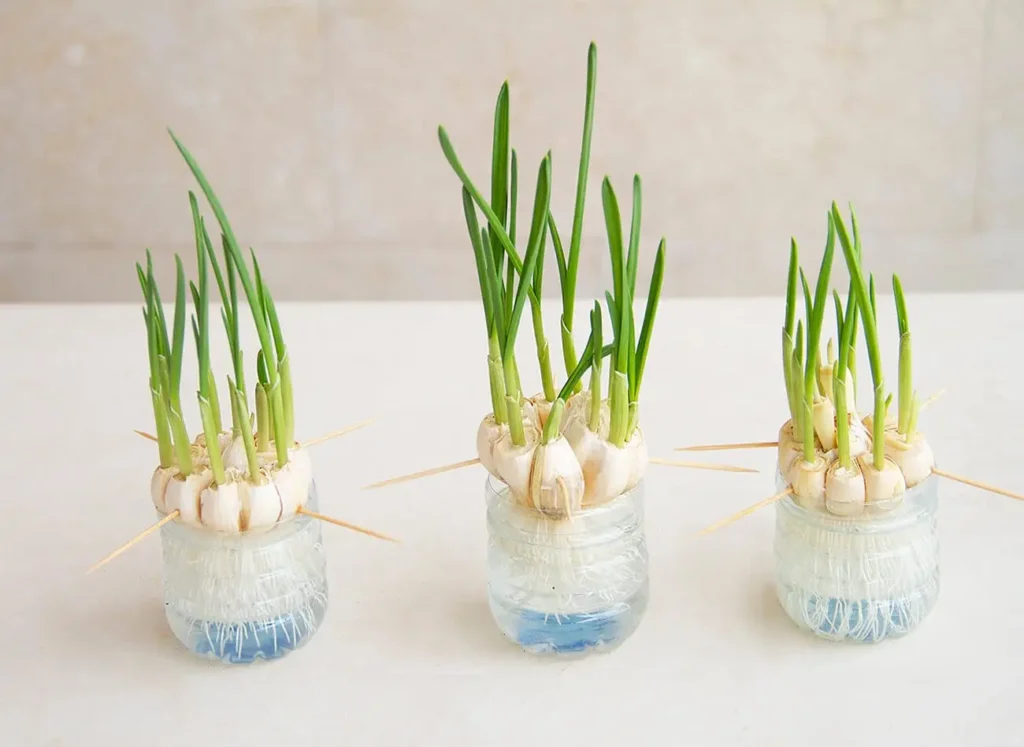
Step 2: Preparing Plastic Bottles
Plastic bottles are the core of this innovative method, providing a lightweight, low-cost container for garlic.
Steps to prepare bottles:
- Use clean, empty plastic bottles (1–2 liters work best).
- Cut the top portion of the bottle to create a wide opening for planting.
- Drill small holes at the bottom for water drainage and air circulation.
- Rinse bottles thoroughly to remove residues.
Plastic bottles create a mini greenhouse effect, maintaining moisture and protecting garlic roots.
Step 3: Preparing Garlic Cloves
Garlic cloves are the starting point for growth.
Steps to prepare cloves:
- Separate the cloves carefully from the bulb, keeping the outer skin intact.
- Select the largest and healthiest cloves for planting.
- Soak cloves in lukewarm water for 1–2 hours to kickstart growth (optional but recommended).
- Avoid cutting or damaging the cloves.
Healthy cloves are crucial for producing many bulbs and large leaves.
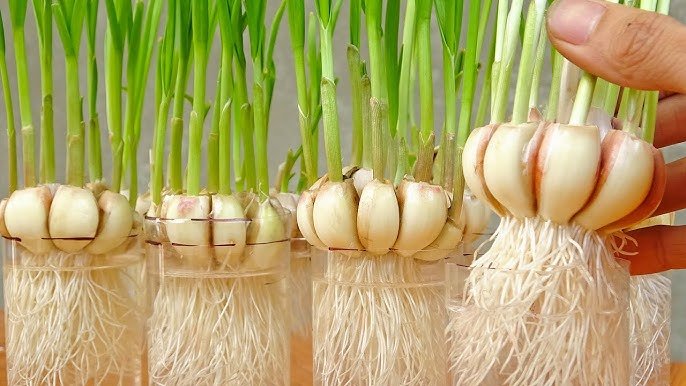
Step 4: Planting Garlic in Plastic Bottles
Planting garlic in bottles is simple and effective.

Steps for planting:
- Fill the bottle with water just below the bottom of the cloves, allowing roots to grow into the water.
- Insert cloves vertically, pointed side up.
- Keep the top of the cloves slightly above the water level.
- Place bottles in a sunny location, ideally with 4–6 hours of sunlight daily.
Pro Tip: Change the water every 2–3 days to prevent stagnation and promote root health.
Step 5: Caring for Garlic Plants
Garlic in water requires minimal but consistent care.
Water and nutrient care:
- Maintain water level just below the base of cloves.
- Add liquid organic fertilizer like compost tea every 2 weeks to encourage growth.
- Avoid overfilling, which may cause cloves to rot.
Sunlight and temperature:
- Garlic prefers cool to moderate temperatures, around 18–24°C (65–75°F).
- Ensure bottles receive sunlight for at least 4–6 hours daily.
Step 6: Encouraging Large Leaves and Healthy Bulbs
Large leaves are essential as they store energy for bulb development.
Tips for maximizing leaf growth:
- Ensure adequate sunlight; insufficient light leads to small, weak leaves.
- Use a liquid fertilizer rich in nitrogen to promote lush green growth.
- Maintain consistent moisture, as water stress can stunt leaves.
- Remove yellow or damaged leaves promptly to allow new growth.
Healthy leaves are a sign of strong garlic plants and a high-yield harvest.

Step 7: Pest and Disease Management
Growing garlic in water reduces soil-borne diseases, but pests may still appear.
Tips:
- Monitor plants for aphids or mold on leaves.
- Spray diluted neem oil or mild garlic solution if pests appear.
- Ensure water is clean and changed regularly to avoid fungal growth.
- Maintain proper spacing between bottles for air circulation.
Organic and careful management ensures healthy garlic growth without chemicals.
Step 8: Harvesting Garlic
Garlic grown in bottles produces bulbs and edible leaves.
Harvesting tips:
- Leaves can be harvested when they are 6–8 inches long; cut as needed.
- Bulbs can be harvested after 90–120 days, depending on growth.
- Remove bulbs gently from water, rinse, and allow them to dry in a cool, ventilated place.
This method ensures both large, healthy leaves for cooking and many cloves for future planting.
Step 9: Replanting for Continuous Harvest
One of the biggest advantages of this method is replanting garlic cloves from harvested bulbs:
- Separate cloves from a mature bulb.
- Select the largest, healthiest cloves for the next batch.
- Follow the same planting steps in fresh water.
This allows continuous garlic production, providing leaves and bulbs year-round.

Step 10: Advantages of Growing Garlic in Plastic Bottles

Growing garlic in plastic bottles is innovative and efficient:
Space-saving: Perfect for small terraces, balconies, or kitchen windowsills.
Cost-effective: Reuse bottles instead of buying containers.
Low-maintenance: Requires minimal watering and care.
Chemical-free: Control your inputs and grow organic garlic.
High yield: Produces multiple bulbs and large leaves even in limited space.
Even urban gardeners can enjoy a continuous supply of garlic with minimal effort.
Step 11: Culinary and Health Benefits
Homegrown garlic offers versatility and health benefits:
Leaves: Can be used like green onions in soups, stir-fries, and salads.
Bulbs: Perfect for cooking, roasting, or making garlic paste.
Health benefits:
- Boosts immunity and fights infections
- Supports heart health and lowers blood pressure
- Acts as an antioxidant and anti-inflammatory agent
- Adds flavor without extra calories
Homegrown garlic is more nutritious and flavorful than store-bought varieties.
Step 12: Tips for Maximum Success
- Use large, healthy cloves for planting.
- Ensure consistent water levels below the base of cloves.
- Provide 4–6 hours of sunlight daily.
- Add liquid fertilizer every 2 weeks to encourage growth.
- Harvest leaves regularly and bulbs at maturity for continuous production.
- Monitor for pests and mold to maintain plant health.
Following these tips ensures large leaves, multiple bulbs, and year-round garlic supply.

Conclusion: Easy Garlic Gardening for Everyone
The YouTube video “How to grow garlic in plastic bottles with water for many bulbs and large leaves” demonstrates that home garlic cultivation can be easy, space-efficient, and productive.
By following these steps — selecting quality cloves, preparing plastic bottles, maintaining water levels, providing sunlight, fertilizing, and harvesting carefully — anyone can enjoy lush garlic leaves and multiple healthy bulbs without a traditional garden.
Start growing garlic in plastic bottles today and enjoy fresh, organic, and highly productive garlic right at home.