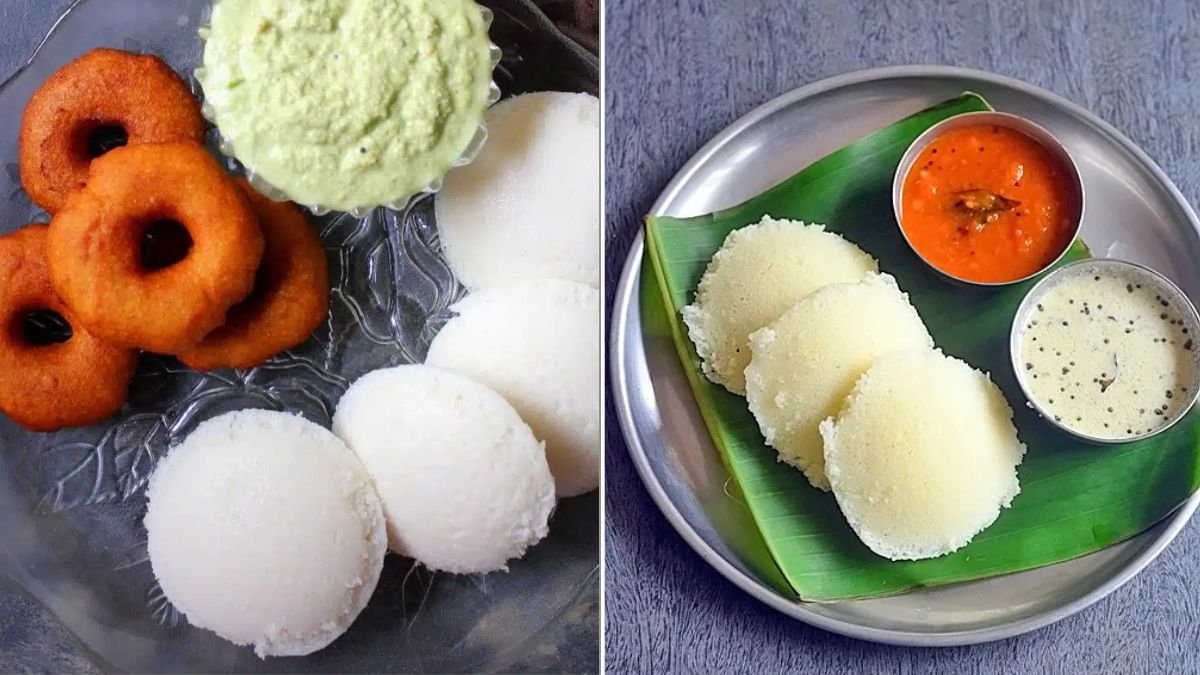
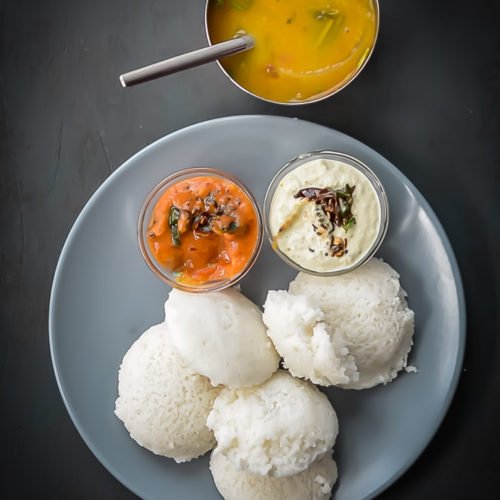
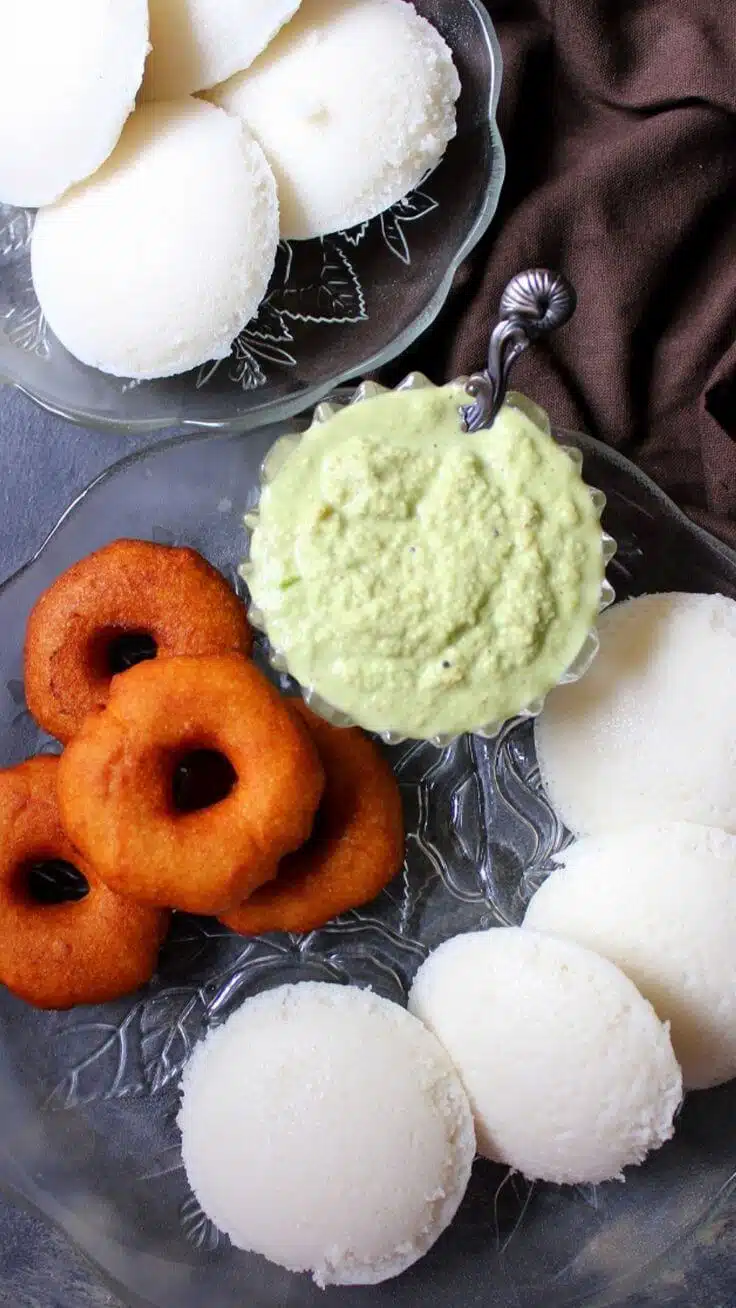
If there’s one dish that perfectly captures the essence of South Indian comfort food, it’s the idli — those soft, fluffy, cloud-like rice cakes that melt in your mouth. A steaming plate of idlis served with coconut chutney and a bowl of sambar isn’t just breakfast; it’s a warm hug from South India’s culinary tradition.
But while idlis look simple, every home cook knows how tricky it can be to get them just right. Sometimes they turn out dense, sometimes flat, and sometimes sticky. The secret lies in mastering the fermentation process, batter consistency, and steaming technique — and once you do, you’ll never go back to instant mixes again.
Here’s your 5-step guide to making soft, spongy, perfectly risen idlis every single time, just like the ones you get in South Indian households.
Step 1: Choose and Measure Your Ingredients Right

Making soft idlis begins with the right ingredients — and the correct proportions. The classic idli batter is made with parboiled rice (idli rice) and urad dal (split black gram).
Ingredients for Idli Batter (makes about 20 idlis):
- Idli Rice (Parboiled Rice) – 2 cups
- Urad Dal (Split Black Gram, skinned) – ½ cup
- Fenugreek Seeds (Methi) – ½ teaspoon
- Poha (Flattened Rice) – 2 tablespoons (optional, for extra softness)
- Salt – To taste
- Water – As needed
Why These Ingredients Matter:
- Idli rice gives structure and volume to the idlis.
- Urad dal adds airiness and fermentation power.
- Fenugreek seeds help the batter ferment faster and enhance the aroma.
- Poha (optional) adds a lovely softness to idlis, especially in cooler climates.
Pro Tip: Always use fresh urad dal — old dal won’t ferment well.

Step 2: Soak Each Ingredient Separately
Soaking is the first and most important step in creating a light, aerated batter.
- Rinse the rice 2–3 times until the water runs clear. Then soak it in plenty of water for at least 4–6 hours.
- Rinse and soak the urad dal and fenugreek seeds together for 4 hours.
- If using poha, soak it for just 20 minutes before grinding.
Why separate soaking?
Urad dal and rice require different grinding times and water ratios. Soaking them separately ensures both grind to the ideal texture.
Pro Tip: For ultra-soft idlis, use cold filtered water — it prevents the batter from heating up during grinding, which can affect fermentation.
Step 3: Grind to the Perfect Consistency
Grinding is where the magic starts — the texture of your batter determines the fluffiness of your idlis.
You can use a wet grinder (traditional stone grinder) or a high-speed mixer grinder. Wet grinders are preferred for authentic results because they retain the dal’s fluffiness without overheating it.

How to Grind the Batter:
- Grind the Urad Dal:
- Drain the soaked urad dal and methi seeds.
- Add small amounts of water gradually while grinding.
- Grind for 10–15 minutes until you get a smooth, fluffy, and light batter. It should be airy, like whipped cream.
- Grind the Rice:
- Drain and grind the soaked rice separately.
- Use just enough water to make a slightly coarse batter (like fine semolina).
- Combine Both Batters:
- Mix the urad dal and rice batters together in a large bowl.
- Add soaked poha (if using) at this stage and mix well.
- Stir gently with your hand for about a minute — this helps activate fermentation by adding natural yeast from your skin.
Consistency Check: The combined batter should be pourable but thick, similar to pancake batter.
Pro Tip: Avoid over-grinding. Overheating destroys beneficial microorganisms that help the batter rise.
Step 4: Ferment for the Perfect Rise
Fermentation is what gives idlis their signature soft, spongy texture. During this process, natural bacteria and yeast in the air (and from your hands) feed on the carbohydrates in the batter, releasing gases that make it rise.
Fermentation Process:
- Cover the batter loosely with a lid — it needs airflow.
- Place it in a warm spot (ideally around 30°C / 86°F) for 8–12 hours or overnight.
- The batter should double in volume and look bubbly on top when done.
If you live in a cool climate, try these tricks:
- Place the batter in your oven with the light on (not heated).
- Keep it inside a turned-off microwave with a cup of warm water.
- Wrap the container in a thick towel to retain warmth.
How to Know It’s Ready:

- The batter has risen visibly and feels airy.
- It smells slightly sour (a pleasant tang).
- Tiny bubbles appear on the surface.
Pro Tip: Never stir the batter vigorously after fermentation — just fold it gently before steaming.
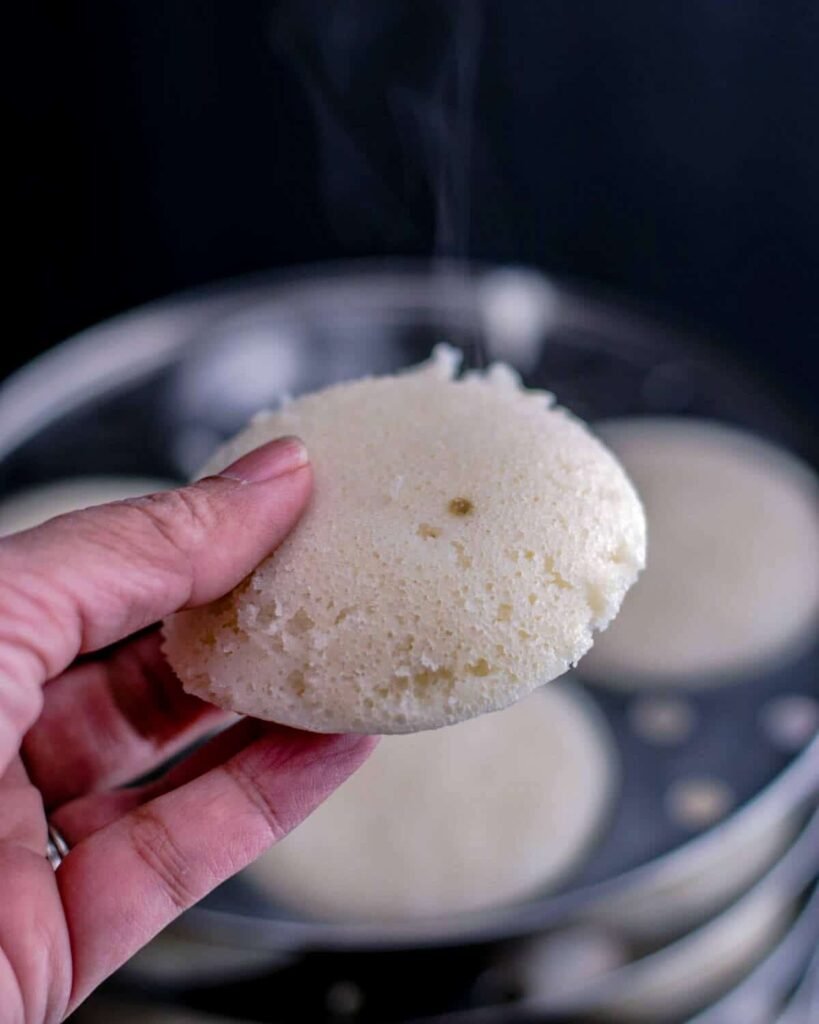
Step 5: Steam Idlis to Fluffy Perfection

Now for the most satisfying part — steaming those perfect, pillow-soft idlis!
Before Steaming:
- Add salt to the fermented batter and mix gently.
- Grease your idli molds lightly with oil or ghee.
- Pour the batter into the molds, filling each about ¾ full (to allow for expansion).
Steaming Process:
- Place the filled molds in a steamer or pressure cooker.
- If using a cooker, remove the whistle/weight so steam can escape.
- Steam for 10–12 minutes on medium heat.
- To check doneness, insert a toothpick into an idli — if it comes out clean, they’re ready.
Once done, allow the idlis to rest for 2–3 minutes before demolding. Then gently lift them out with a spoon or butter knife.
Pro Tip: Over-steaming makes idlis hard and dry. Stick to 10–12 minutes — soft and fluffy every time!
Serving Suggestions
Soft idlis are delicious on their own, but they shine brightest when paired with flavorful accompaniments. Here are a few classic ways to enjoy them:

- Coconut Chutney: A blend of grated coconut, roasted chana dal, green chilies, and tempered with curry leaves and mustard seeds.
- Sambar: Spicy, tangy lentil stew loaded with vegetables and tamarind.
- Tomato or Onion Chutney: A zesty twist for those who like a bit of heat.
- Idli Podi (Gunpowder): A dry, nutty chutney powder mixed with sesame oil or ghee — a South Indian favorite.
And if you have leftover idlis? Don’t throw them away! Try:
- Fried Idli Bites: Tossed with curry leaves and mustard seeds.
- Idli Upma: Crumbled idlis sautéed with onions and chilies.
- Masala Idli: Idlis tossed in spicy tomato masala.
Troubleshooting Common Idli Problems
| Problem | Cause | Fix |
|---|---|---|
| Idlis are flat/dense | Batter didn’t ferment properly | Ensure batter rises and use fresh urad dal |
| Idlis are sticky | Overfermented or too much water | Mix gently and check consistency before steaming |
| Batter didn’t rise | Cold weather or poor fermentation | Keep in a warm spot or add a pinch of baking soda before steaming |
| Idlis are dry/hard | Over-steamed or old batter | Steam for less time and use freshly fermented batter |
Pro Tips for Soft Idlis Every Time
- Use your hands to mix the batter — it encourages natural fermentation.
- Don’t add salt before fermenting if you live in a cold region; it slows the process. Add it afterward.
- Never refrigerate batter before fermentation. Always ferment first, then store.
- Always use idli rice, not raw rice or basmati — it affects texture.
- Add poha or cooked rice to the batter for extra softness.
Final Thoughts
Soft, fluffy idlis aren’t just about ingredients — they’re about patience and care. The process may take time, but once you master it, making idlis will feel effortless.
In just five easy steps, you can create perfect idlis every time:
- Measure and soak ingredients properly
- Grind to the right consistency
- Ferment till bubbly and light
- Steam just right
- Serve with love (and chutney!)
The beauty of idlis lies in their simplicity — made from humble rice and dal, yet capable of bringing people together over breakfast tables across India.
So next weekend, skip the instant mix. Soak, grind, ferment, and steam — and watch as your kitchen fills with the aroma of freshly steamed idlis, soft enough to melt in your mouth.