Pumpkins are more than just a Halloween decoration — they’re nutritious, versatile, and a gardener’s delight. Imagine harvesting giant, healthy pumpkins from the comfort of your home using a simple, inexpensive method. The YouTube video “How to Grow Giant Pumpkins in Styrofoam Boxes – The Super Fruit Hack Nobody Told You!” reveals a super-efficient technique that allows you to cultivate massive pumpkins in limited spaces using recycled Styrofoam boxes.
This guide will take you step by step through the process of growing giant pumpkins, from selecting seeds to harvesting, with tips on soil preparation, fertilization, watering, and care for maximum yield.
Why Grow Pumpkins at Home
Homegrown pumpkins have several advantages:
Cost-effective: Grow large fruits at home instead of buying expensive ones.
Organic produce: Control fertilizers, pesticides, and ensure chemical-free growth.
Space-saving: Styrofoam boxes are perfect for small terraces or patios.
Fun and educational: Great project for kids and beginners.
High yield: With proper care, a single pumpkin plant can produce a massive fruit.
Even urban gardeners with small spaces can enjoy super-sized pumpkins with this method.
Step 1: Choosing the Right Pumpkin Variety
For giant pumpkin cultivation, selecting the right variety is crucial.
Recommended varieties for giant pumpkins:
- Atlantic Giant — classic giant pumpkin variety
- Big Max — known for its large size and easy growth
- Prizewinner — popular for competitions
- Kakai Pumpkin — fast-growing and robust
Tips:

- Choose healthy seeds from a reputable supplier.
- Look for seeds with high germination rates and disease resistance.
- Giant pumpkins require longer growing seasons (usually 120–140 days).
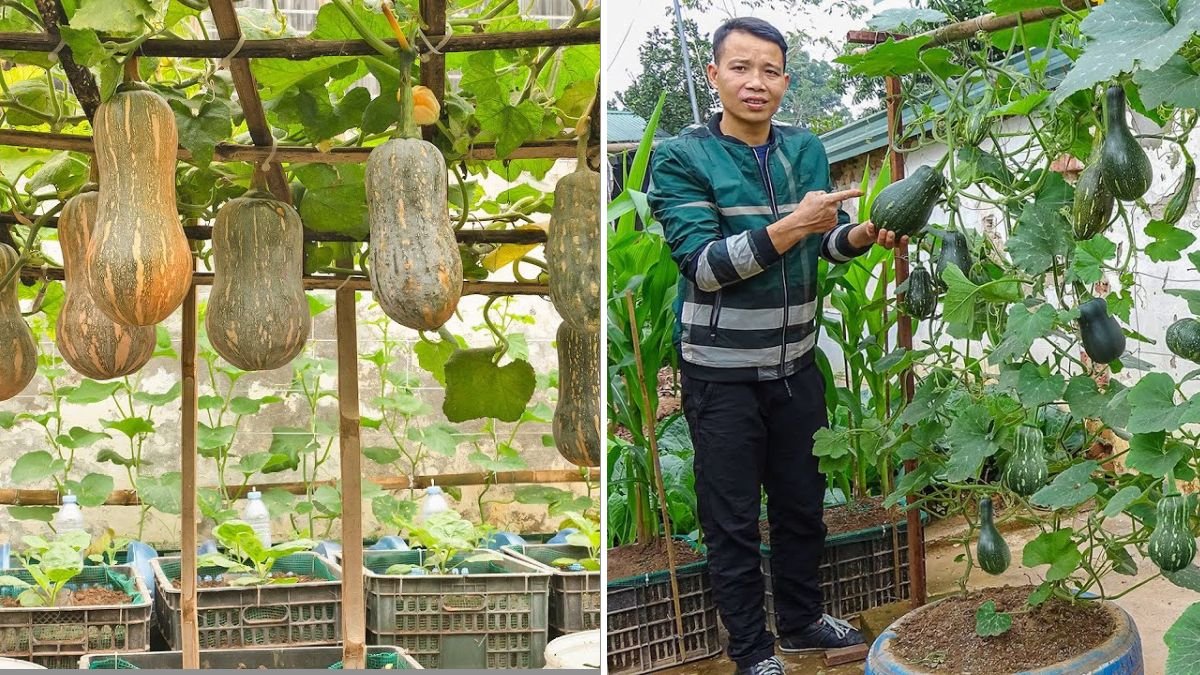
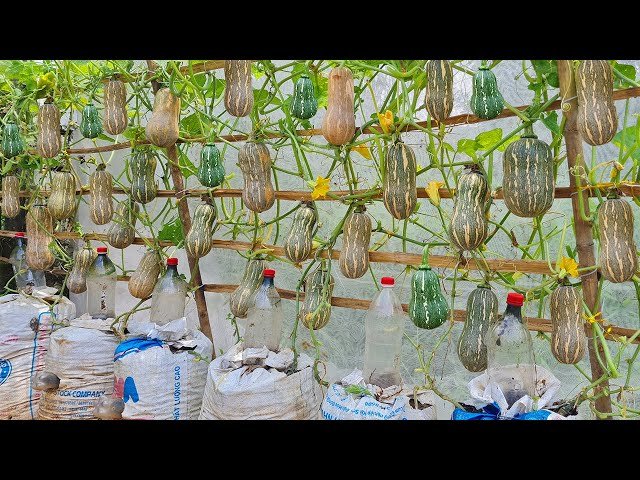
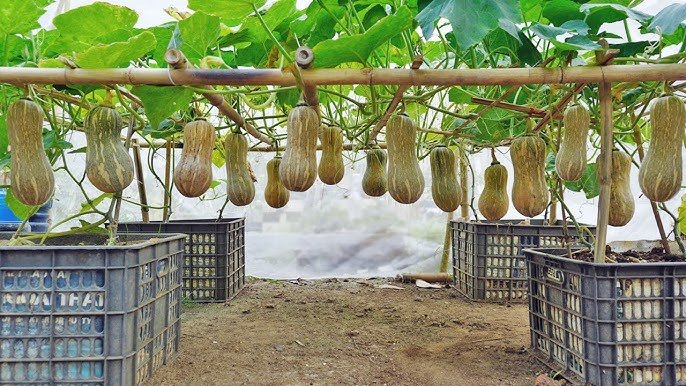
Step 2: Preparing Styrofoam Boxes
Styrofoam boxes are lightweight, insulating, and inexpensive — perfect for pumpkin cultivation.
How to prepare:
- Select a large Styrofoam box (minimum 60×40×30 cm).
- Drill multiple drainage holes at the bottom to prevent waterlogging.
- Place the box in a sunny location, as pumpkins require 6–8 hours of direct sunlight.
Styrofoam boxes also protect roots from extreme heat or cold, creating a stable environment for growth.
Step 3: Preparing Soil Mix
Giant pumpkins are heavy feeders and need nutrient-rich, well-draining soil.
Recommended soil mix for Styrofoam boxes:
- 40% garden soil or topsoil
- 30% well-rotted compost or cow manure
- 20% sand or perlite for drainage
- 10% coco peat or peat moss for moisture retention
Tips:
- Mix soil thoroughly to ensure uniform nutrients.
- Add bone meal or rock phosphate for strong root and fruit development.
- Avoid compacted soil that can restrict root growth.
Step 4: Seed Germination
Healthy seedlings are the foundation of giant pumpkins.
Steps for germination:

- Soak seeds in lukewarm water for 6–8 hours.
- Place seeds in seed trays or small pots with a light seed-starting mix.
- Keep the soil moist but not waterlogged.
- Place in a warm, sunny spot; germination typically occurs within 7–10 days.
Transplant seedlings when they develop 2–3 true leaves.
Step 5: Planting in Styrofoam Boxes
Once seedlings are ready, it’s time to transplant them into the Styrofoam boxes:
- Fill the box with the prepared soil mix.
- Make a hole slightly larger than the root ball.
- Gently place the seedling and cover the roots.
- Water lightly to settle the soil.
Pro Tip: Only plant 1–2 seedlings per box to ensure each pumpkin has enough nutrients and space to grow.
Step 6: Watering and Moisture Management
Pumpkins require consistent moisture, especially during flowering and fruit development.
Watering tips:
- Water deeply 2–3 times per week, adjusting for rainfall and temperature.
- Avoid waterlogging; Styrofoam boxes have drainage holes to help.
- Mulch around the base with straw, dry leaves, or shredded paper to retain moisture and prevent soil temperature fluctuations.
Proper moisture management is key for giant fruit growth.
Step 7: Fertilization and Nutrient Care

Giant pumpkins are nutrient-hungry and require frequent feeding:
- Initial growth: Use nitrogen-rich fertilizers or compost for strong vines and leaves.
- Flowering stage: Switch to phosphorus-rich fertilizers to promote flower development.
- Fruit development: Apply potassium-rich fertilizers to ensure large, sweet fruits.
- Organic alternatives: Vermicompost, banana peel powder, and cow dung slurry.
Regular feeding encourages rapid growth and huge pumpkins.

Step 8: Flowering and Pollination
Pumpkins produce both male and female flowers:
- Male flowers appear first, followed by female flowers that develop into fruits.
- Pollination can be done naturally by bees or hand-pollinated for better results.
- Use a soft brush to transfer pollen from male to female flowers.
Proper pollination is essential for fruit set and giant pumpkin development.
Step 9: Supporting Vines
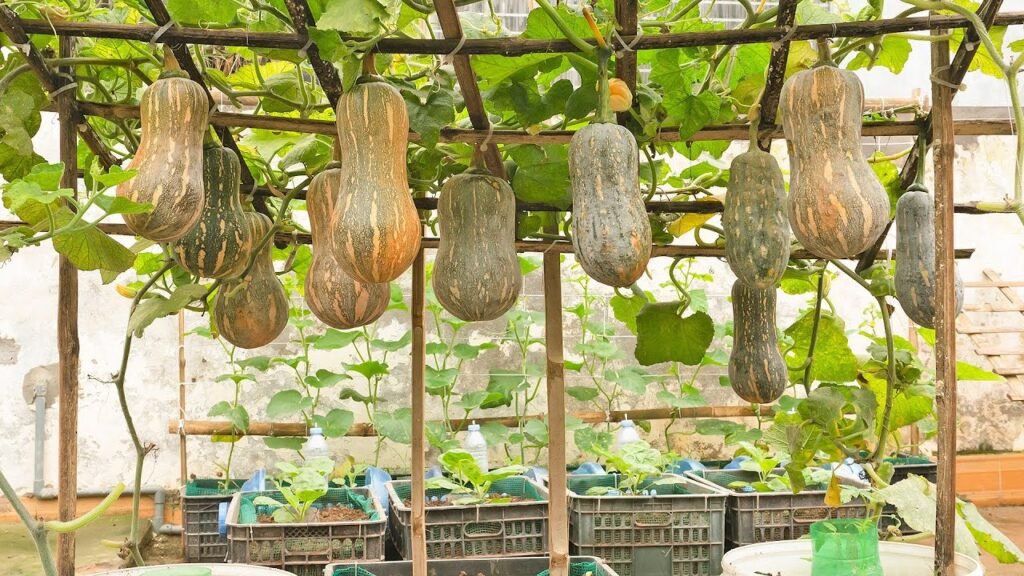
Pumpkin vines grow vigorously and can spread widely. In Styrofoam boxes, use vine management techniques:
- Train vines to grow around the box or along trellises if space is limited.
- Avoid cutting vines; let them grow naturally for maximum fruit size.
- Keep soil around the vines free of weeds.
Benefits:
- Keeps pumpkins clean
- Ensures sufficient nutrients for each fruit
- Prevents damage from pests and excessive sun exposure
Step 10: Protecting Fruits
Giant pumpkins are prone to pests, diseases, and sunburn:
- Place straw or cardboard under developing fruits to prevent rotting.
- Check regularly for pests like aphids, beetles, and caterpillars.
- Use organic sprays like neem oil or garlic-chili solution for protection.
- Avoid direct scorching sun during peak hours to prevent skin damage.
Proper care ensures healthy, blemish-free giant pumpkins.
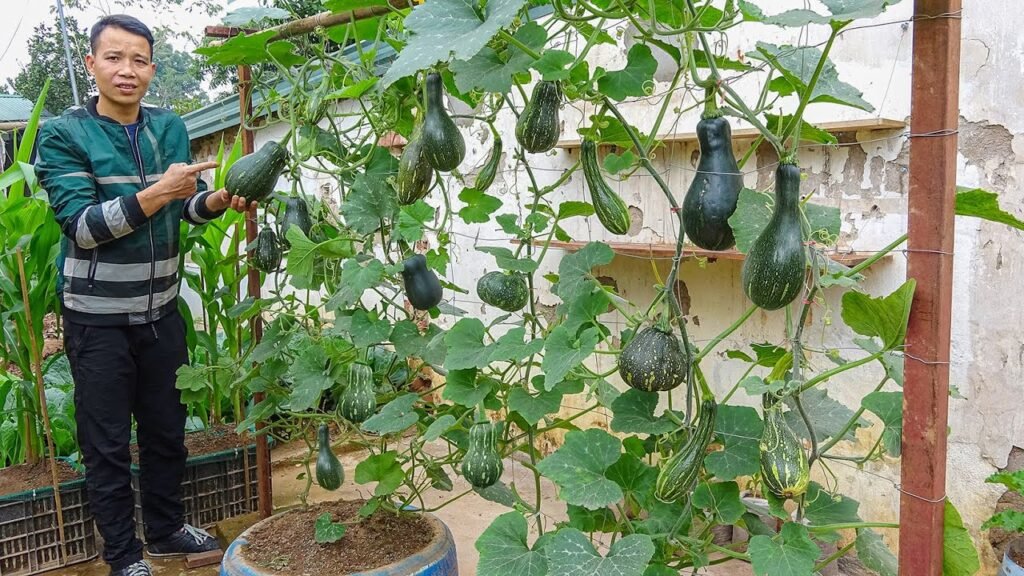
Step 11: Harvesting Giant Pumpkins
Giant pumpkins usually take 120–140 days to mature:
- Harvest when the skin turns deep orange and is firm.
- Use a sharp knife to cut the pumpkin, leaving a short stem attached.
- Avoid harvesting too early; this affects size and flavor.
With this Styrofoam box method, even urban gardeners can grow pumpkins weighing 20–30 kg or more.

Step 12: Advantages of Using Styrofoam Boxes
Using Styrofoam boxes has several unique advantages:
Cost-effective: Recycle old boxes instead of buying large pots.
Lightweight: Easy to move and manage on terraces or balconies.
Thermal insulation: Protects roots from extreme temperatures.
Space-efficient: Ideal for small urban gardens.
High yield: Concentrated nutrients and space encourage giant fruit growth.
Even with limited space, you can enjoy massive pumpkins using this hack.
Step 13: Tips for Maximum Growth
- Ensure 6–8 hours of sunlight daily.
- Mulch soil to retain moisture and prevent temperature fluctuations.
- Fertilize regularly with organic and balanced fertilizers.
- Hand-pollinate flowers for better fruit set.
- Monitor vines and manage their spread carefully.
- Protect developing fruits with straw or shade if necessary.
Following these tips ensures giant, healthy, and high-quality pumpkins.
Step 14: Uses of Homegrown Giant Pumpkins
Homegrown giant pumpkins are versatile:
Halloween decorations and contests
Soups, pies, and baked dishes
Juices and smoothies
Seeds for roasting or planting next season
Animal feed (if needed)
Fresh pumpkins grown at home are nutritious, chemical-free, and extremely satisfying to harvest.
Conclusion: Grow Giant Pumpkins at Home
The YouTube video “How to Grow Giant Pumpkins in Styrofoam Boxes – The Super Fruit Hack Nobody Told You!” demonstrates that growing giant pumpkins is possible, even in small spaces.

By following these steps — selecting healthy seeds, preparing Styrofoam boxes, enriching soil, watering, fertilizing, supporting vines, and protecting fruits — you can enjoy giant, impressive pumpkins at home.
Start today, and turn your terrace or balcony into a pumpkin paradise, impressing family, friends, and neighbors with your massive, homegrown fruits!