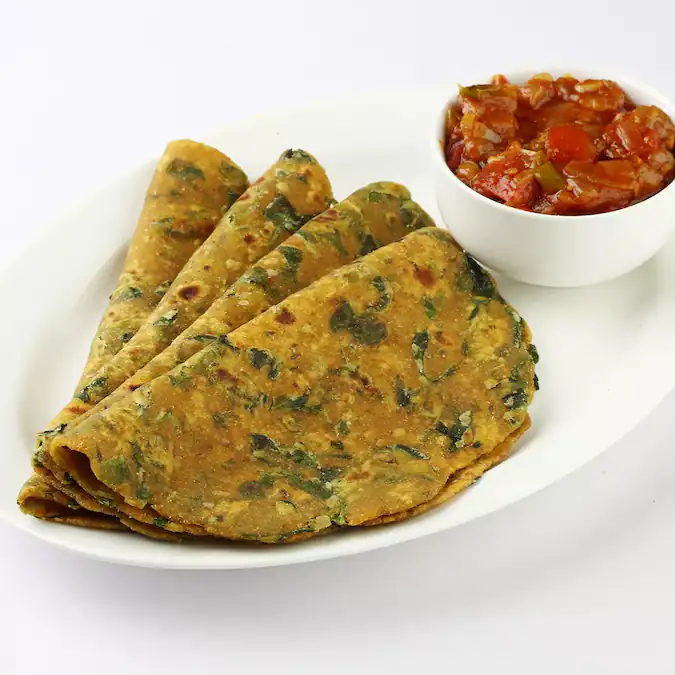
Methi Thepla is a quintessential Gujarati delight—thin, soft, and flavorful flatbreads infused with fresh fenugreek leaves and aromatic spices. Loved for breakfast, lunchboxes, or even as an evening snack, thepla combines taste, nutrition, and versatility. While some may think making soft, non-sticky theplas is tricky, it becomes simple when you follow the 6 easy steps below. With the right technique and ingredients, you can prepare soft, tasty, and perfectly cooked methi theplas every time.
Step 1: Gather Fresh Ingredients
The first step to perfect methi theplas is choosing fresh ingredients. Fresh fenugreek leaves (methi) provide the signature flavor, while the right flour and spices ensure softness and taste. Here’s what you’ll need for 6–8 medium-sized theplas:
Ingredients:
- 2 cups whole wheat flour (atta)
- 1 cup fresh methi leaves (fenugreek), finely chopped
- 2–3 green chilies, finely chopped
- 1 tsp ginger paste
- 1 tsp turmeric powder
- 1 tsp red chili powder
- 1 tsp cumin powder (optional)
- 1/2 tsp asafoetida (hing)
- 1 tsp carom seeds (ajwain) or cumin seeds
- 2 tbsp yogurt (optional, for softness)
- Salt to taste
- 2–3 tbsp oil (for dough and cooking)
- Water, as required, for kneading
Pro Tip: Choose fresh, tender methi leaves to avoid bitterness. Avoid using old or wilted leaves.
Step 2: Wash and Prepare Fenugreek Leaves

Proper preparation of methi leaves ensures they blend well into the dough without releasing excess water.
Steps:

- Wash the fenugreek leaves thoroughly to remove dirt and grit.
- Pat them dry using a clean kitchen towel or let them air dry. Excess moisture can make the dough sticky.
- Chop the leaves finely. Small pieces incorporate better into the dough and distribute flavor evenly.
Tip: Remove thick stems if you prefer a smoother texture in your theplas.
Step 3: Make the Dough
The dough is the foundation of soft and tasty theplas. Proper kneading and ingredient balance are key.
Steps:
- In a large mixing bowl, combine whole wheat flour, turmeric, red chili powder, cumin powder, asafoetida, and carom seeds.
- Add chopped methi leaves, green chilies, and ginger paste. Mix well.
- Add yogurt (if using) and 2 tbsp oil. Yogurt adds softness and a slight tang.
- Gradually add water, little by little, and knead into a soft, pliable dough. Avoid making the dough too stiff or too sticky.
- Cover the dough with a damp cloth and let it rest for 15–20 minutes.
Pro Tip: Resting the dough allows the flour to absorb moisture and makes rolling easier, resulting in softer theplas.
Step 4: Roll the Theplas
Rolling is an important step to achieve uniform, thin, and evenly cooked theplas.
Steps:

- Divide the dough into equal-sized balls (about lemon-sized).
- Lightly flour your rolling surface and rolling pin to prevent sticking.
- Roll each ball into a thin circle, about 6–8 inches in diameter.
- Avoid using too much dry flour while rolling, as it can make the theplas dry and hard.
Tip: Aim for thin, even circles. Thick theplas take longer to cook and may not remain soft.
Step 5: Cook the Theplas
Cooking at the right temperature and timing is crucial for soft, golden theplas.
Steps:
- Heat a tava or non-stick skillet over medium heat.
- Place a rolled thepla on the hot tava. Cook for 30–40 seconds until small bubbles appear.
- Flip and apply a few drops of oil or ghee on the cooked side.
- Flip again and cook the other side with a little oil until golden brown spots appear.
- Press lightly with a spatula for even cooking, but don’t over-press, as it can make the thepla hard.
Pro Tip: Cook on medium heat for even browning. High heat can burn theplas on the outside while leaving the inside uncooked.
Step 6: Serve and Store
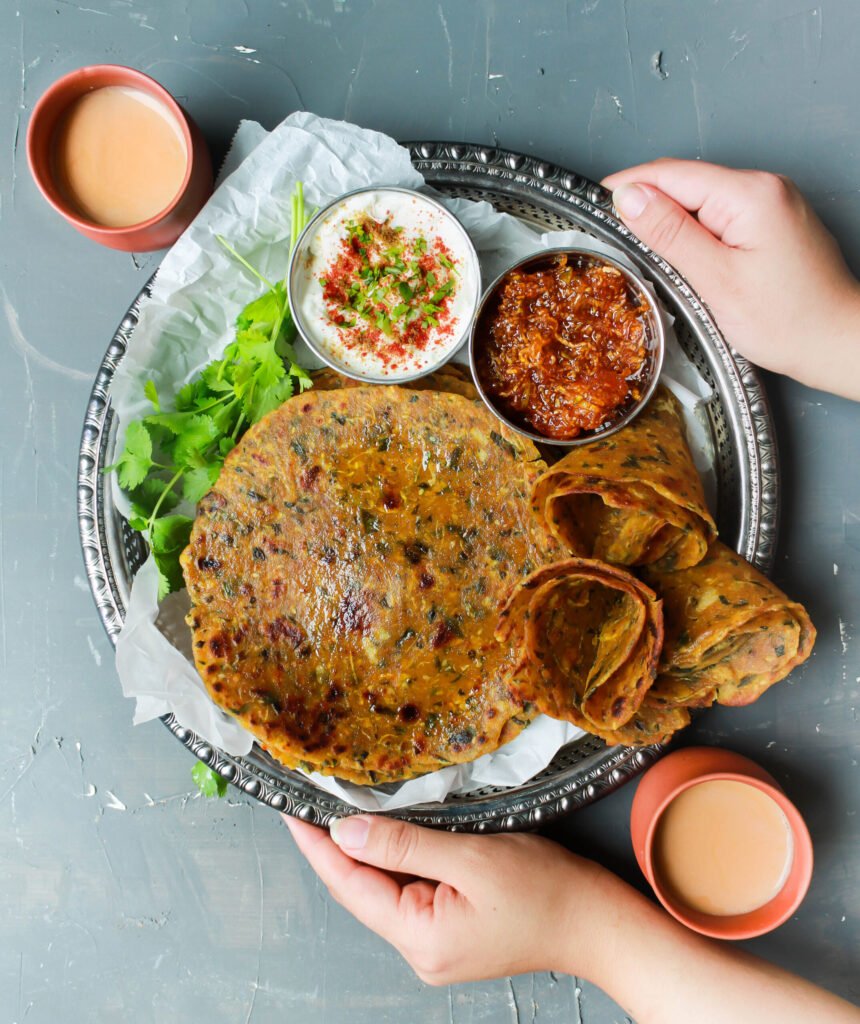
Methi Thepla is best enjoyed hot, but can also be stored for later use.
Serving Suggestions:

- Serve with plain yogurt (curd) or pickles for a traditional Gujarati meal.
- Pair with green chutney for a flavorful snack.
- Roll and pack in lunchboxes—they stay soft for a few hours when wrapped in foil or placed in an airtight container.
Storage Tips:
- Store in an airtight container for 1–2 days.
- To reheat, warm on a tava or in a microwave for a few seconds to restore softness.
Pro Tip: If packing for travel, apply a thin layer of ghee or oil between stacked theplas to prevent sticking.
Tips for Soft and Flavorful Methi Theplas
- Fresh Ingredients: Always use fresh methi leaves and good-quality whole wheat flour.
- Proper Kneading: Knead the dough well to develop softness.
- Resting the Dough: Allowing the dough to rest prevents cracking while rolling.
- Even Rolling: Thin, uniform theplas cook evenly and stay soft.
- Medium Heat Cooking: Avoid high heat to prevent hard or burnt theplas.
- Yogurt or Oil in Dough: Both add moisture and softness.
By following these tips, your theplas will be soft, flavorful, and visually appealing every time.
Variations of Methi Thepla
Methi Thepla can be customized to suit taste preferences and dietary needs:
- Masala Thepla: Add finely chopped ginger, garlic, and green chilies for a spicier flavor.
- Oats Thepla: Replace part of the wheat flour with oats for a healthier, fiber-rich option.
- Multigrain Thepla: Use a mix of wheat, millet, and chickpea flour for added nutrition.
- Paneer Thepla: Incorporate crumbled paneer for a soft and protein-rich twist.
- Dry Fruits & Seeds: Add sesame seeds, flax seeds, or poppy seeds for texture and flavor.
Experimenting with these variations keeps methi theplas exciting and versatile.
Health Benefits of Methi Thepla
Methi Thepla isn’t just tasty—it’s also nutritious:

- Fenugreek Leaves: Rich in iron, vitamins, and antioxidants; good for digestion and blood sugar regulation.
- Whole Wheat Flour: Provides fiber, energy, and keeps you full longer.
- Yogurt: Adds probiotics and enhances digestibility.
- Spices: Turmeric, chili, and cumin aid digestion and add anti-inflammatory properties.
This makes methi thepla a wholesome, balanced, and healthy option for any meal or snack.
Serving Ideas
Methi Theplas are incredibly versatile and can be enjoyed in multiple ways:
- Breakfast: Serve with plain yogurt and pickle.
- Lunchbox Snack: Wrap in foil and pack with chutney or a small salad.
- Evening Snack: Enjoy with tea or coffee for a nutritious and satisfying snack.
- Meal Accompaniment: Serve alongside dal, curry, or vegetable dishes for a complete meal.
Pro Tip: Drizzle a little ghee on top while serving to enhance flavor and softness.
Conclusion
Methi Thepla is a delicious, nutritious, and versatile flatbread that can be enjoyed at any time of the day. By following these 6 easy steps—gathering fresh ingredients, preparing methi leaves, kneading the dough, rolling evenly, cooking properly, and serving thoughtfully—you can make soft, tasty, and perfectly cooked theplas every time.
Key Takeaways:
- Use fresh methi leaves and quality flour for best flavor.
- Knead dough well and let it rest for softness.
- Roll thin and even theplas for uniform cooking.
- Cook on medium heat to prevent hard or burnt theplas.
- Serve hot with yogurt, pickles, or chutney for authentic taste.
- Store carefully if packing for lunch or travel to maintain softness.
With practice, methi theplas become quick to prepare, consistently soft, and full of flavor, making them an ideal choice for breakfast, snacks, or light meals. Enjoy the wholesome goodness of methi combined with aromatic spices in this classic Gujarati delicacy!