
Few dishes can rival the aroma, flavor, and richness of a well-made biryani. Layers of fragrant basmati rice, spiced vegetables, caramelized onions, and saffron-infused ghee come together in a dish that feels as festive as it is comforting. While biryani is often seen as complex, the truth is—you can make perfect vegetable biryani at home in just a few easy steps with the right guidance.
Whether you’re a seasoned cook or new to Indian cuisine, this step-by-step guide will help you master a delicious, restaurant-style vegetable biryani that bursts with color, fragrance, and flavor.
What Makes a Great Vegetable Biryani?
Before diving into the steps, it’s worth understanding what sets biryani apart from other rice dishes like pulao.
- Biryani is layered, not mixed. The rice and vegetables are cooked separately and then combined in layers for “dum” (steam cooking).
- Aromatic basmati rice is key—it should be long-grained, fluffy, and not sticky.
- Balanced spice blend gives biryani its distinct flavor—warm, earthy, and slightly floral from ingredients like saffron, cardamom, and cinnamon.
- Ghee or oil helps coat the rice and enhance aroma.
- Patience is the final ingredient; biryani rewards slow, mindful cooking.
Now, let’s walk through the 7 easy steps to make your perfect vegetable biryani.
Step 1: Gather Your Ingredients
Before starting, ensure you have everything ready—biryani is all about timing and layering.
For the Rice:
- 2 cups aged basmati rice (soaked 30 minutes)
- 1 bay leaf
- 3–4 green cardamoms
- 1 small piece cinnamon
- 4–5 cloves
- Salt to taste
For the Vegetables:
- 1 cup carrots, chopped
- 1 cup green beans, chopped
- ½ cup peas
- 1 bell pepper, diced
- 1 potato, cubed
- 1 tomato, chopped
- 2 green chilies, slit
For the Marinade:
- 1 cup thick yogurt (curd)
- 2 tbsp ginger-garlic paste
- ½ tsp turmeric
- 1 tsp red chili powder
- 1 tsp coriander powder
- 1 tsp garam masala
- Salt to taste
- 2 tbsp mint leaves, chopped
- 2 tbsp cilantro (coriander leaves), chopped
- 1 tbsp lemon juice
For the Fried Onions (Birista):
- 2 large onions, thinly sliced
- 3 tbsp oil or ghee
For Dum (Final Cooking):
- 2 tbsp ghee
- A few saffron strands, soaked in 3 tbsp warm milk
- 2 tbsp fried onions (for garnish)
- Fresh mint and coriander leaves
Step 2: Fry the Onions (Birista)

The deep caramelized onions, or birista, are one of the secrets to authentic biryani flavor.

How to make it:
- Heat oil or ghee in a large pan over medium heat.
- Add thinly sliced onions and fry until golden brown and crispy, stirring often.
- Remove and place on paper towels to drain excess oil.
Pro tip: Do this step slowly—rushing can burn the onions and make them bitter.
These fried onions will add depth, aroma, and sweetness to your biryani. Set some aside for layering and some for garnish.
Step 3: Cook the Basmati Rice Perfectly
The hallmark of great biryani is fluffy, separate grains of rice.
How to cook:
- Bring 6–7 cups of water to a boil in a large pot.
- Add bay leaf, cardamom, cloves, cinnamon, and salt.
- Add soaked rice and cook until it’s 70–80% done—the grains should still have a slight bite.
- Drain the rice immediately and spread it on a large plate or tray to cool slightly.
Pro tip: Do not overcook. Remember, the rice will cook again during the final “dum” steaming stage.

Step 4: Prepare the Vegetable Masala
Now it’s time to build the heart of the biryani—the spiced vegetable mixture.
How to make:
- In a heavy-bottomed pot or pan, heat 2 tbsp oil or ghee.
- Add cumin seeds, a bay leaf, and a cinnamon stick.
- Add the slit green chilies and sauté for 30 seconds.
- Add all the chopped vegetables and cook for 5–6 minutes until slightly tender.
- Add chopped tomato and cook until it turns mushy.
Now add your yogurt marinade (from Step 1) to the vegetables. Stir well to coat evenly.
- Cover and simmer for 10–12 minutes on low heat, allowing the flavors to blend.
- Turn off the heat once the masala thickens and oil begins to separate.
Taste and adjust salt or spice levels.
Optional: For extra richness, add 2 tbsp cream or coconut milk toward the end of cooking.
Step 5: Layer the Biryani

Traditional biryani is layered for a reason—each layer traps aroma and flavor that infuses through the rice during “dum” cooking.

How to do it:
- Take a heavy-bottomed pot (or a Dutch oven). Grease the bottom with ghee.
- Add half of the cooked vegetable masala as the bottom layer.
- Add half of the rice over it in an even layer.
- Sprinkle:
- Fried onions
- A few mint and coriander leaves
- Half of the saffron milk
- A drizzle of ghee
- Add the remaining vegetable masala and top with the remaining rice.
- Repeat the garnish: fried onions, herbs, saffron milk, and ghee.
Pro tip: Always start and end with a rice layer for even cooking and aroma.
Step 6: “Dum” Cooking (Steam Method)
This final step transforms your biryani from delicious to unforgettable. “Dum” means cooking on slow steam—sealing the flavors inside.
Two easy methods:
Traditional Dum (Stovetop)
- Seal the pot with a tight-fitting lid.
- If your lid isn’t snug, place a layer of dough (made from flour and water) around the rim before sealing to trap steam.
- Cook on medium heat for 5 minutes, then reduce to low heat for 20–25 minutes.
- Let it rest for 10 minutes before opening.
Oven Method
- Preheat your oven to 180°C (350°F).
- Seal the pot with foil and bake for 25 minutes.
Pro tip: Place a tawa (flat pan) under the biryani pot to prevent the bottom from burning.
When done, the rice should be fluffy, each grain distinct, and infused with rich, spicy aroma.

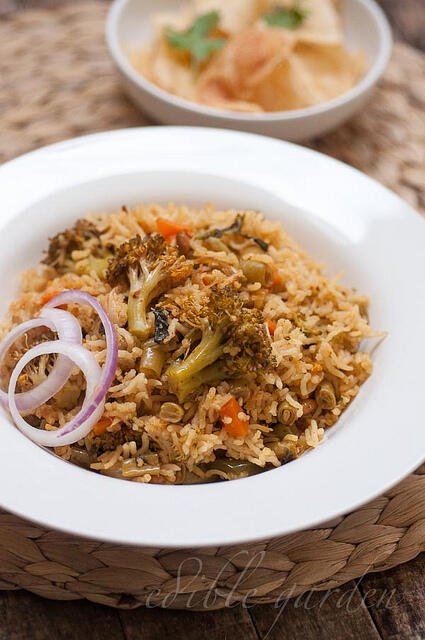
Step 7: Serve and Enjoy
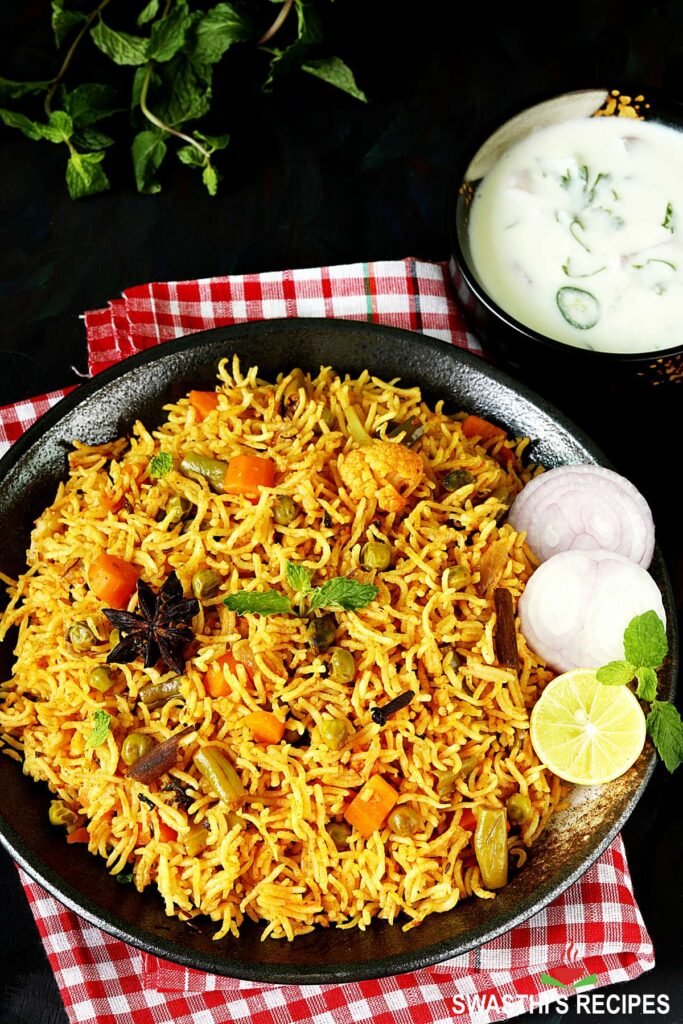
Carefully mix the biryani from the bottom, gently folding so the rice and masala combine without breaking the grains.
Garnish with:
- Fresh mint and coriander leaves
- Crispy fried onions
- A drizzle of ghee or saffron milk for a royal touch
Serving suggestions:
- Serve hot with raita (yogurt with cucumber or onion), papad, and lemon wedges.
- A simple salad or pickle on the side complements the dish perfectly.
Pro tip: Vegetable biryani tastes even better after a few hours as the flavors meld—making it ideal for gatherings or next-day meals.
Tips for Perfect Vegetable Biryani Every Time

- Choose quality rice: Long-grain aged basmati makes a world of difference.
- Don’t skip the soaking: Soaked rice cooks more evenly and stays separate.
- Use thick yogurt: Thin curd can make the masala watery.
- Go easy on water: The vegetable masala should be thick before layering.
- Cook on low heat: Slow “dum” cooking is what gives biryani its soul.
- Let it rest: Always rest your biryani for 10 minutes before serving—it helps the flavors settle.
- Add a handful of nuts or fried raisins: Optional, but it adds wonderful texture and luxury.
A Note on Variations
Once you’ve mastered this basic recipe, you can experiment freely:
- Hyderabadi Vegetable Biryani: Add fried cashews and use saffron-soaked milk for extra richness.
- Kolkata Biryani: Add boiled potatoes and a dash of kewra (screw pine) essence.
- South Indian Biryani: Use coconut milk in the masala and curry leaves for a fragrant twist.
Final Thoughts
Biryani isn’t just a dish—it’s an experience that brings together aroma, flavor, and tradition in every bite. And the best part? You don’t need meat to make it magical. With these 7 easy steps, you can prepare a perfect vegetable biryani that’s rich, satisfying, and sure to impress everyone at the table.

Take your time, trust the process, and savor the result. Once you lift the lid and the first waft of saffron and spice hits you—you’ll know it was worth every minute.
Serve with love, and enjoy your masterpiece!